Faheem

Connect to Autonomous Database using SQLPlus

Connect to Autonomous db using sqlplus

In this post I will describe how to connect to Autonomous Database using SQL*PLUS

Steps: Connecting to Autonomous Database using SQL*PLUS

To connect to Autonomous database we need to download the client credentials wallet

  1. From Autonomous database details page: Click on DB Connection

2. Select Download Wallet

3. Enter the credentials to protect wallet and Click on Download, once downloaded close the window.

Connect using SQL*PLUS

  1. Unzip the credentials on the machine where Oracle client is installed
[oracle@ol7-db wallet]$ pwd
/u01/wallet
[oracle@ol7-db wallet]$ ls -ltrh
total 24K
-rw-r--r--. 1 oracle oinstall 21K Mar 31 23:13 Wallet_orbgadb.zip
[oracle@ol7-db wallet]$ unzip Wallet_orbgadb.zip
Archive:  Wallet_orbgadb.zip
  inflating: README
  inflating: cwallet.sso
  inflating: tnsnames.ora
  inflating: truststore.jks
  inflating: ojdbc.properties
  inflating: sqlnet.ora
  inflating: ewallet.p12
  inflating: keystore.jks
[oracle@ol7-db wallet]$

2. Edit the sqlnet.ora and specify the correct wallet location
In my case Wallet unzipped location is : /u01/wallet

WALLET_LOCATION = (SOURCE = (METHOD = file) (METHOD_DATA = (DIRECTORY="?/network/admin")))
SSL_SERVER_DN_MATCH=yes

To

WALLET_LOCATION = (SOURCE = (METHOD = file) (METHOD_DATA = (DIRECTORY="/u01/wallet")))
SSL_SERVER_DN_MATCH=yes

3. Set the TNS environment variable and verify the connection

export TNS_ADMIN=/u01/wallet
tnsping orbgadb_low
sqlplus admin@orbgadb_low

Output:

[oracle@ol7-db wallet]$ export TNS_ADMIN=/u01/wallet
[oracle@ol7-db wallet]$
[oracle@ol7-db wallet]$ tnsping orbgadb_low

TNS Ping Utility for Linux: Version 18.0.0.0.0 - Production on 31-MAR-2021 23:45:35

Copyright (c) 1997, 2018, Oracle.  All rights reserved.

Used parameter files:
/u01/wallet/sqlnet.ora


Used TNSNAMES adapter to resolve the alias
Attempting to contact (description= (retry_count=20)(retry_delay=3)(address=(protocol=tcps)(port=1522)(host=adb.me-dubai-1.oraclecloud.com))(connect_data=(service_name=atrc9lotdxsjqrj_orbgadb_low.adb.oraclecloud.com))(security=(ssl_server_cert_dn=CN=adb.me-dubai-1.oraclecloud.com,OU=Oracle ADB DUBAI,O=Oracle Corporation,L=Redwood City,ST=California,C=US)))
OK (150 msec)
[oracle@ol7-db wallet]$
[oracle@ol7-db wallet]$
[oracle@ol7-db wallet]$ sqlplus admin@orbgadb_low

SQL*Plus: Release 18.0.0.0.0 - Production on Wed Mar 31 23:45:44 2021
Version 18.3.0.0.0

Copyright (c) 1982, 2018, Oracle.  All rights reserved.

Enter password:
Last Successful login time: Wed Mar 31 2021 23:24:18 +04:00

Connected to:
Oracle Database 19c Enterprise Edition Release 19.0.0.0.0 - Production
Version 19.5.0.0.0

SQL> 

Hope this helps…

Connect to Autonomous Database using SQL Developer

Connect to Autonomous Database using SQL Developer

In this post I will describe how to connect to Autonomous Database using SQL Developer

Steps: Connecting to Autonomous Database using SQL Developer

To connect to Autonomous database we need to download the client credentials wallet

  1. From Autonomous database details page: Click on DB Connection

2. Select Download Wallet

3. Enter the credentials to protect wallet and Click on Download, once downloaded close the window.

Connect using SQL Developer

Open SQL Developer and create a new connection using Cloud Wallet

Once the connection is Success, click on Connect

Hope this helps…

Autonomous Database creation on Oracle Cloud

Oracle Autonomous database creation

In this post I will describe the step by step creation of Oracle 19c Autonomous Transaction Processing Database in Oracle Cloud using OCI Console.

Oracle Cloud Free Tier will allows you to sign up for an Oracle Cloud account which provides a number of Always Free services and a free credit of 300$ which can be use on all eligible Oracle cloud Infrastructure services for up to 30 days. The Always Free services are available for an unlimited period of time. Kindly click here to know more in detail.

Refer the below article to get the step by step instruction on how to setup Network components and for creation of Virtual Machine on OCI Cloud
Step by step creation of Oracle cloud free tier account and creating a VM

The following steps will be covered in this article:

  1. Creation of Autonomous Database.
  2. Connecting to Autonomous Database.

Creation of Autonomous Database:

  1. Open the navigation menu. Under Core Infrastructure, click on Autonomous Transaction Processing.

2. Click on Create Autonomous Database

3. In Create Autonomous Database section Enter the below details:
Display Name, Database Name

Choose workload type: Transaction Processing
Deployment type: Shared Infrastructure

Choose the Database version, OCPU Count and Storage(TB)
Auto scaling should be enabled

Provide the Administrator Credentials

Choose the Access type & license type
Finally Create Autonomous Database

You can see the Provisioning the ATP database has started

After few minutes the ATP database is up and running

Connecting to Autonomous Database

To connect to Autonomous database we need to download the client credentials wallet

  1. From Autonomous database details page: Click on DB Connection

2. Select Download Wallet

3. Enter the credentials to protect wallet and Click on Download, once downloaded close the window.

Connect using SQL Developer

Open SQL Developer and create a new connection using Cloud Wallet

Once the connection is Success, click on Connect

Unplug and Plugin Pluggable database (PDB)

Unplug and plugin pdb

Oracle has introduced new Multitenant Option from Oracle 12cR1 and this option allows a single container database (CDB) to host multiple pluggable databases.

One of the most powerful feature of Oracle Multitenant is Unplug and Plug In a PDB from one CDB to another CDB.

Refer here for more details on Oracle Multitenant option.

Description:

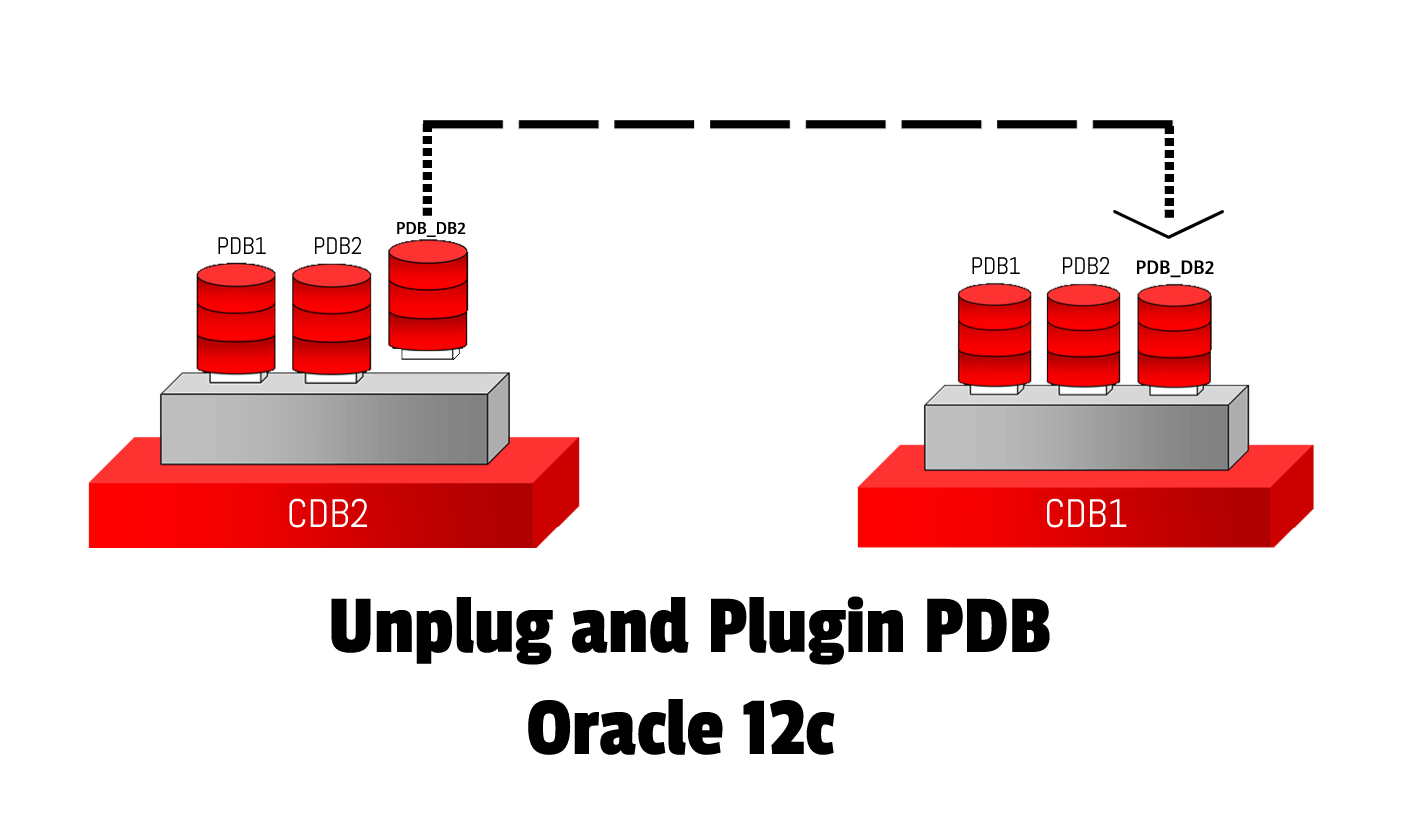
In this post I will describe how to Unplug and Plugin a PDB from one CDB to another CDB in Oracle 12c. Here I have used 2 CDBs running on the same VM. Below are the details,

Source CDB: CDB2 –> Unplug pdb_db2 from cdb2
Target CDB: CDB1 –> Plug pdb_db2 to cdb1

SQL> select d.name db_name, p.name pdb_name, p.open_Mode from v$pdbs p, v$database d;

DB_NAME   PDB_NAME        OPEN_MODE
--------- --------------- ----------
CDB2      PDB$SEED        READ ONLY
CDB2      PDB1            READ WRITE
CDB2      PDB2            READ WRITE
CDB2      PDB3            READ WRITE
CDB2      PDB_DB2_NEW     READ WRITE
CDB2      PDB_DB2         READ WRITE

SQL> select d.name db_name, p.name pdb_name, p.open_Mode from v$pdbs p, v$database d;

DB_NAME   PDB_NAME        OPEN_MODE
--------- --------------- ----------
CDB1      PDB$SEED        READ ONLY
CDB1      PDB1            READ WRITE

In the below example I will unplug pdb_db2 from CDB2 and plugin to CDB1.

Below are the steps:

Unplug the PDB from CDB
  1. Connect to the source CDB ( as sysdba)
  2. Close the PDB to unplug
  3. Unplug the PDB
  4. Drop the PDB pdb_db2 by preserving the datafiles
  5. Verify the status of the unplugged PDB

Plug In the PDB to CDB

  1. Connect to the target CDB ( as sysdba)
  2. Run DBMS_PDB.CHECK_PLUG_COMPATIBILITY Function
  3. Plug In the PDB using the metadata (xml) file
  4. Open the PDB database

Unplugging the PDB pdb_db2 from CDB cdb2

  1. Connect to the source CDB ( as sysdba)

Set the DB Environment to connect source CDB and connect to CDB$ROOT using sysdba privilege

[oracle@cdb12c ~]$ . oraenv
ORACLE_SID = [cdb2] ?
The Oracle base remains unchanged with value /u01/app/oracle
[oracle@cdb12c ~]$ sqlplus

SQL*Plus: Release 12.2.0.1.0 Production on Thu Feb 11 03:44:53 2021

Copyright (c) 1982, 2016, Oracle.  All rights reserved.

Enter user-name: /as sysdba

Connected to:
Oracle Database 12c Enterprise Edition Release 12.2.0.1.0 - 64bit Production

SQL> show con_name;

CON_NAME
------------------------------
CDB$ROOT
SQL>

2. Close the PDB(pdb_db2) to unplug

Before unplugging, the pdb has to be closed.

select name, open_mode from v$pdbs;
alter pluggable database pdb_db2 close;

o/p:
SQL> select name, open_mode from v$pdbs;

NAME            OPEN_MODE
--------------- ----------
PDB$SEED        READ ONLY
PDB1            READ WRITE
PDB2            READ WRITE
PDB3            READ WRITE
PDB_DB2_NEW     READ WRITE
PDB_DB2         READ WRITE

6 rows selected.

SQL> alter pluggable database pdb_db2 close immediate;

Pluggable database altered.

3. Unplug the PDB

Unplug the closed PDB and then specify the path and name of the XML file.

alter pluggable database pdb_db2 unplug into '/u01/pdb_clone/pdb_db2.xml';
select name, open_mode from v$pdbs;

o/p:
SQL> alter pluggable database pdb_db2 unplug into '/u01/pdb_clone/pdb_db2.xml';

Pluggable database altered.

SQL> select name, open_mode from v$pdbs;

NAME            OPEN_MODE
--------------- ----------
PDB$SEED        READ ONLY
PDB1            READ WRITE
PDB2            READ WRITE
PDB3            READ WRITE
PDB_DB2_NEW     READ WRITE
PDB_DB2         MOUNTED

6 rows selected.

4. Drop the PDB pdb_db2 by preserving the datafiles

Drop the closed PDB and keep the data files.
Specify KEEP DATAFILES to retain the data files associated with the PDB after the PDB is dropped. The temp file for the PDB is deleted because it is no longer needed. This is the default.

drop pluggable database pdb_db2 keep datafiles;
select name, open_mode from v$pdbs;

o/p:

SQL> drop pluggable database pdb_db2 keep datafiles;

Pluggable database dropped.

SQL>
SQL> select name, open_mode from v$pdbs;

NAME            OPEN_MODE
--------------- ----------
PDB$SEED        READ ONLY
PDB1            READ WRITE
PDB2            READ WRITE
PDB3            READ WRITE
PDB_DB2_NEW     READ WRITE

5. Verify the status of the unplugged PDB

select name, open_mode from v$pdbs where name ='PDB_DB2';

SQL> select name, open_mode from v$pdbs where name ='PDB_DB2';

no rows selected

Successfully unplugged the PDB pdb_db2 from CDB cdb2, Now let see how to plug this PDB to CDB1.

Plug In the PDB pdb_db2 to CDB1

  1. Connect to the target CDB ( as sysdba)

Set the environment variable of target CDB and connect to CDB$ROOT as sysdba

.oraenv
sqlplus "/as sysdba"
show con_name

o/p:

[oracle@cdb12c admin]$ . oraenv
ORACLE_SID = [cdb2] ? cdb1
The Oracle base remains unchanged with value /u01/app/oracle
[oracle@cdb12c admin]$ sqlplus

SQL*Plus: Release 12.2.0.1.0 Production on Thu Feb 11 04:12:40 2021

Copyright (c) 1982, 2016, Oracle.  All rights reserved.

Enter user-name: /as sysdba

Connected to:
Oracle Database 12c Enterprise Edition Release 12.2.0.1.0 - 64bit Production

SQL> show con_name

CON_NAME
------------------------------
CDB$ROOT
SQL>

2. Run DBMS_PDB.CHECK_PLUG_COMPATIBILITY Function

Before Plug In the database make sure the unplugged PDB is compatible with the new host.

SET SERVEROUTPUT ON
DECLARE
 compatible CONSTANT VARCHAR2(3) :=
  CASE DBMS_PDB.CHECK_PLUG_COMPATIBILITY(
      pdb_descr_file => '/u01/pdb_clone/pdb_db2.xml',
      pdb_name => 'pdb_db2')
  WHEN TRUE THEN 'YES'
  ELSE 'NO'
END;
BEGIN
 DBMS_OUTPUT.PUT_LINE(compatible);
END;
/

o/p:
SQL> SET SERVEROUTPUT ON
DECLARE
 compatible CONSTANT VARCHAR2(3) :=
  CASE DBMS_PDB.CHECK_PLUG_COMPATIBILITY(
      pdb_descr_file => '/u01/pdb_clone/pdb_db2.xml',
      pdb_name => 'pdb_db2')
  WHEN TRUE THEN 'YES'
  ELSE 'NO'
END;
BEGIN
 DBMS_OUTPUT.PUT_LINE(compatible);
END;
/
YES

PL/SQL procedure successfully completed.

3. Plug In the PDB using the metadata (xml) file

create pluggable database pdb_db2 using '/u01/pdb_clone/pdb_db2.xml' NOCOPY TEMPFILE REUSE;
select con_id, name, open_mode from v$pdbs;
select name from v$datafile where con_id=4;

o/p:

SQL> create pluggable database pdb_db2 using '/u01/pdb_clone/pdb_db2.xml' NOCOPY TEMPFILE REUSE;

Pluggable database created.

SQL>
SQL> select con_id, name, open_mode from v$pdbs;

    CON_ID NAME            OPEN_MODE
---------- --------------- ----------
         2 PDB$SEED        READ ONLY
         3 PDB1            READ WRITE
         4 PDB_DB2         MOUNTED

SQL> select name from v$datafile where con_id=4;

NAME
------------------------------------------------
/u01/app/oracle/oradata/cdb2/pdb_db2/CDB2/B92E25114D543C30E053D138A8C0059C/datafile/o1_mf_system_j0c54z1f_.dbf
/u01/app/oracle/oradata/cdb2/pdb_db2/CDB2/B92E25114D543C30E053D138A8C0059C/datafile/o1_mf_sysaux_j0c54z1o_.dbf
/u01/app/oracle/oradata/cdb2/pdb_db2/CDB2/B92E25114D543C30E053D138A8C0059C/datafile/o1_mf_undotbs1_j0c54z1o_.dbf
/u01/app/oracle/oradata/cdb2/pdb_db2/CDB2/B92E25114D543C30E053D138A8C0059C/datafile/o1_mf_users_j0c54z1p_.dbf

4. Open the PDB database

Open and check the status of the plugged PDB.

alter pluggable database pdb_db2 open;
conn faheem/faheem@cbd12c:1521/pdb_db2
select * from tab;

o/p:
SQL> alter pluggable database pdb_db2 open;

Pluggable database altered.

SQL>  conn faheem/faheem@cdb12c:1521/pdb_db2
Connected.

SQL> select * from test;

        ID
----------
         1

We have succesfully unplug and plug pdb_db2 from cdb2 to cdb1.

Hope this helps..

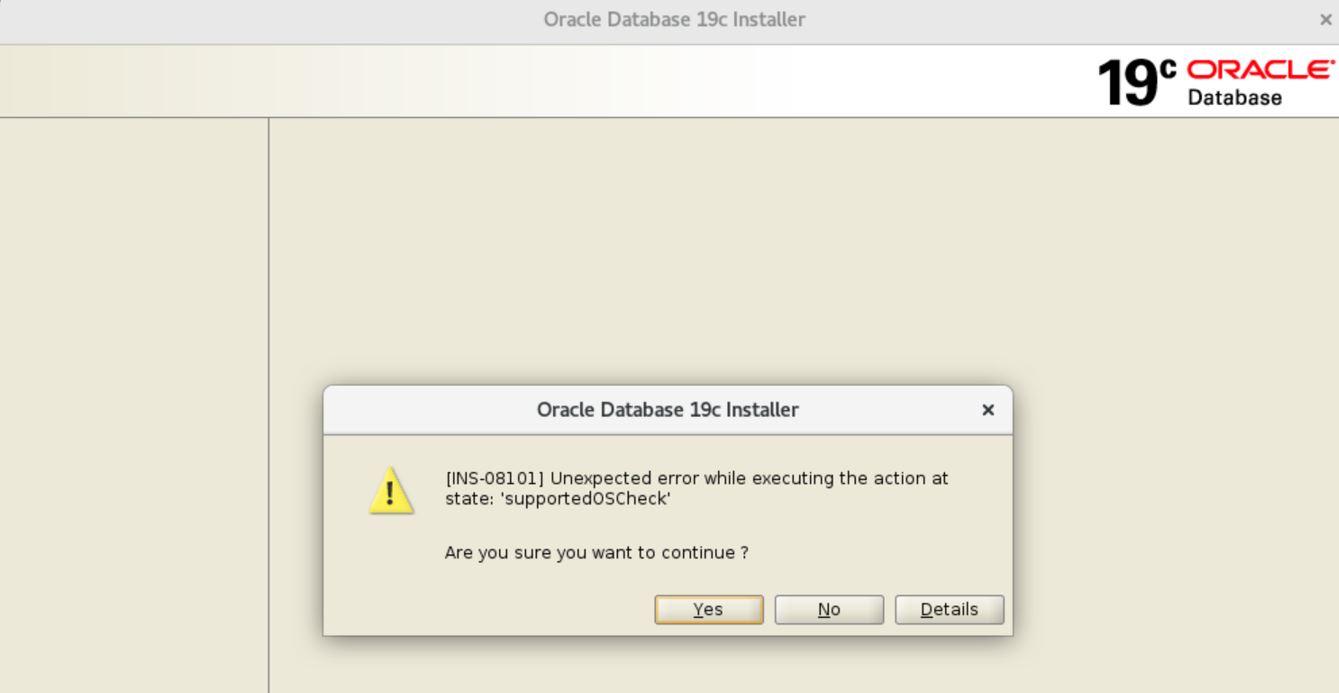
INS-08101 Unexpected error while executing the action at state: ‘supportedOSCheck’

INS-08101

You may get the following error while installing Oracle 19c on Oracle Linux 8 in GUI as well as in silent mode.

[oracle@ol8-db-dr dbhome_1]$ ./runInstaller -silent -responseFile /u01/softwares/19c/db_install.rsp
Launching Oracle Database Setup Wizard...

[WARNING] [INS-08101] Unexpected error while executing the action at state: 'supportedOSCheck'
   CAUSE: No additional information available.
   ACTION: Contact Oracle Support Services or refer to the software manual.
   SUMMARY:
       - java.lang.NullPointerException
[oracle@ol8-db-dr dbhome_1]$

Solution 1: (Temporary):

Export the below variable while runtime and run the runInstaller

export CV_ASSUME_DISTID=OEL7.6

Solution 2 (Permanent):

Edit the cvu_config file under $ORACLE_HOME/cvu/admin and change the below line:

from

# Fallback to this distribution id
#CV_ASSUME_DISTID=OEL5

to

# Fallback to this distribution id
CV_ASSUME_DISTID=OEL8

Hope this helps..

Oracle Linux 8 Installation

Oracle Linux 8

In this article I will describe how to perform a basic Oracle Linux 8 installation by using DVD or ISO in graphical mode. For detail instruction on installation refer oracle doc here.

Download the Oracle Linux 8 DVD/ISO from edelivery.oracle.com

Installation steps:

  1. Boot from the DVD or ISO from to start the installation.
    Select “install Oralce Linux 8.2.0

2. From the language list select the Language and click on Continue button .

3. From the installation summary screen select the below options and configure the settings:

  • Choose the Time & Date
  • Software Selection
  • Installation Destination for Device selection
  • Network and Hostname

Choose the Time & Date: Pick the Region and City by the drop down list

Installation Destination: choose where to install the software and configure the storage

Network & Hostname: Click Configure to configure the network settings, or this can be configure after the system boots.

4. Once all configurations are down, Click on “Begin Installation” to start the OS installation

5. Set the root password: Click on Root Password and set the root Password

6. Once the installation completes, click “Reboot” button

7. Accept the License agreement: Click on “License Information” and check the “I accept the “License Agreement” button and click on “Done” Button. And click on “Finish Configuration

login using root user and verify the OS

We have successfully installed Oracle Linux 8.

Hope this helps..

Oracle Linux 7 Installation

Oracle Linux 7 installation

In this article I will describe how to perform a basic Oracle Linux 7 installation by using DVD or ISO in graphical mode. For detail instruction on installation refer oracle doc here.

Download the Oracle Linux 7 DVD/ISO from edelivery.oracle.com

Installation steps:

  1. Boot from the DVD or ISO from to start the installation.
    Select “install Oralce Linux 7.0

2. . From the language list select the Language and click on Continue button.

3. From the installation summary screen select the below options and configure the settings:

  • Choose the Time & Date
  • Software Selection
  • Installation Destination for Device selection
  • Network and Hostname

Choose the Time & Date: Pick the Region and City by the drop down list

From the software Selection screen select the Base Environment

Network & Hostname: Click Configure to configure the network settings, or this can be configure after the system boots.

Installation Destination: choose where to install the software and configure the storage

4. Once all configurations are down, Click on “Begin Installation” to start the OS installation

5. Set the root password: Click on Root Password and set the root Password

6. Once the installation completes, click “Reboot” button

7. After the system reboot, Click on Root Password and set the root password

8. Accept the License agreement: Click on “License Information” and check the “I accept the “License Agreement” button and click on “Done” Button. And click on “Finish Configuration

9. Enable Kdump if required and click on Forward button

10. Set up the Software Updates and click Forward button

11. Choose the user and enter the password

12. Select the language and click on Next button

13. Select Next

14. Select “Start using Oracle Linux Server”

We have successfully installed Oracle Linux 7.

Hope this helps..

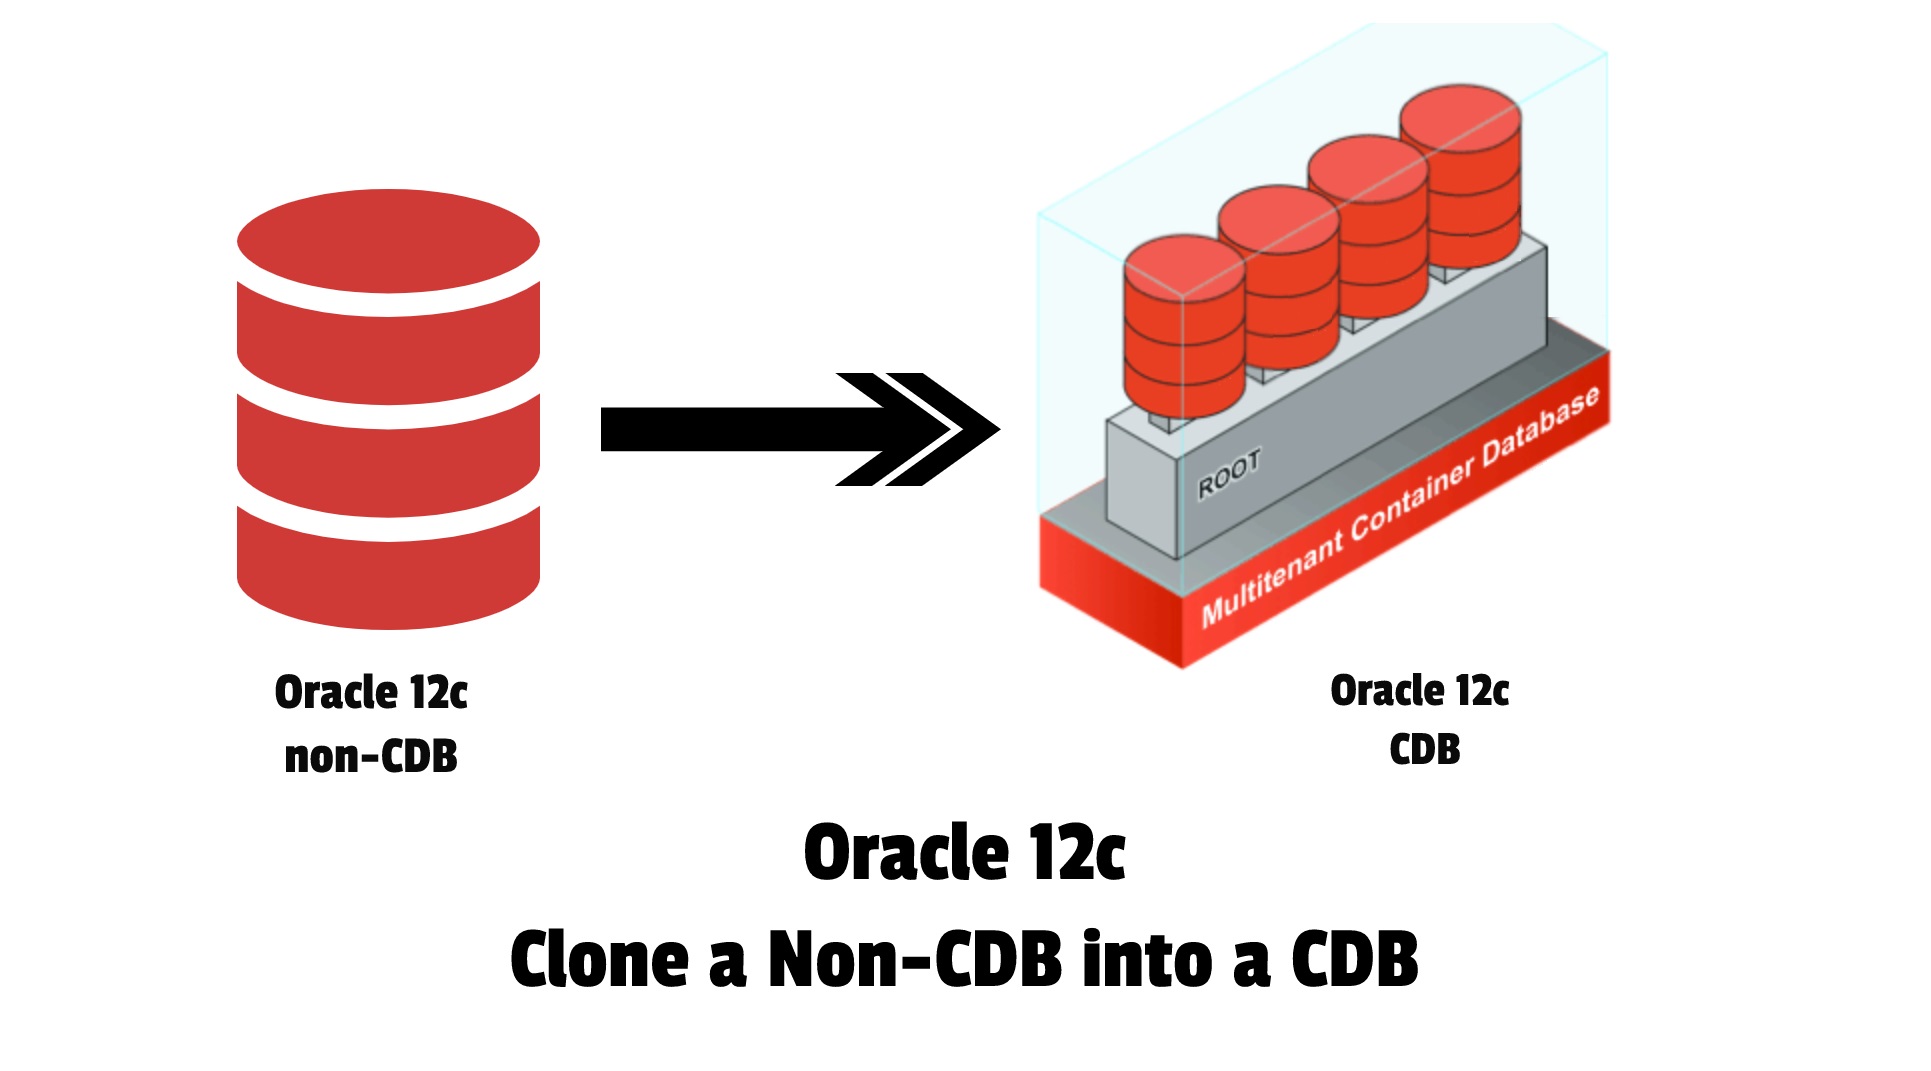
Clone a non-CDB into CDB in Oracle 12c

clone a non-cdb into cdb

Oracle has introduced new Multitenant Option from Oracle 12cR1 and this option allows a single container database (CDB) to host multiple pluggable databases.

Refer here for more details on Oracle Multitenant option.

Related articles:

Create Container Database (CDB) in Oracle 12c using DBCA
Create Container database (CDB) in silent mode
Drop a container database in silent mode
Create a pluggable database manually in Oracle 12c
Clone a pluggable database (PDB) within a CDB in Oracle 12c

Description:

In this post I will describe how to clone a non-CDB database into a CDB in Oracle 12c.

In the below example I have two databases running on the same VM, and will create a new PDB to clone the non-cdb database
db2 – Non-CDB database
cdb2 – CDB database used to clone the non-cdb.
pdb_db2 – new pdb database name which has to clone from non-cdb.

Below are the steps:

  1. Open the non-CDB database into read-only mode
  2. Create directory for new PDB and add new TNS entry to connect non-cdb
  3. Create Database link to allow connection to non-CDB database
  4. Create a new PDB database by cloning the non-cdb using dblink
  5. Execute the noncdb_to_pdb.sql script
  6. Check the newly created PDB status
  7. Open newly created PDB database
1. Open the non-CDB database into read-only mode
export ORACLE_SID=db2
sqlplus "/as sysdba"
shutdown immediate;
startup mount;
alter database open read only;

O/P:
----
[oracle@cdb12c tmp]$ . oraenv
ORACLE_SID = [cdbdev] ? db2
The Oracle base remains unchanged with value /u01/app/oracle
[oracle@cdb12c tmp]$ sqlplus

SQL*Plus: Release 12.2.0.1.0 Production on Tue Jan 19 06:46:34 2021

Copyright (c) 1982, 2016, Oracle.  All rights reserved.

Enter user-name: /as sysdba

Connected to:
Oracle Database 12c Enterprise Edition Release 12.2.0.1.0 - 64bit Production

SQL> shutdown immediate;
Database closed.
Database dismounted.
ORACLE instance shut down.
SQL>
SQL>
SQL> startup mount
ORACLE instance started.

Total System Global Area 2432696320 bytes
Fixed Size                  8623592 bytes
Variable Size             654314008 bytes
Database Buffers         1761607680 bytes
Redo Buffers                8151040 bytes
Database mounted.
SQL>
SQL> alter database open read only;

Database altered.

SQL>
SQL>
2. Create a directory to store new PDB Datafiles and add new TNS entry to connect the non-CDB database
mkdir /u01/app/oracle/oradata/cdb2/pdb_db2

--Add the TNS entry in $ORACLE_HOME/network/admin
db2 =
  (DESCRIPTION =
    (ADDRESS = (PROTOCOL = TCP)(HOST = cdb12c)(PORT = 1521))
    (CONNECT_DATA =
      (SERVER = DEDICATED)
      (SERVICE_NAME = db2)
    )
  )
3. Create Database link to allow connection to non-CDB database
export ORACLE_SID=cdb2
sqlplus "/as sysdba"
create database link to_db2_link connect to system identified by idgroup using 'db2';

select name from v$database@to_db2_link;

O/P:
----
[oracle@cdb12c pdb_db2]$ . oraenv
ORACLE_SID = [db2] ? cdb2
The Oracle base remains unchanged with value /u01/app/oracle
[oracle@cdb12c pdb_db2]$ sqlplus
SQL*Plus: Release 12.2.0.1.0 Production on Tue Jan 19 15:45:17 2021
Copyright (c) 1982, 2016, Oracle.  All rights reserved.
Enter user-name: /as sysdba

Connected to:
Oracle Database 12c Enterprise Edition Release 12.2.0.1.0 - 64bit Production

SQL>  create database link to_db2_link connect to system identified by idgroup using 'db2';

Database link created.

SQL> select name from v$database@to_db2_link;
NAME
---------
DB2
SQL>
4. Create a new PDB database by cloning the non-CDB using dblink
export ORACLE_SID=cdb2
sqlplus "/as sysdba"
create pluggable database PDB_DB2 from NON$CDB@to_db2_link create_file_dest='/u01/app/oracle/oradata/cdb2/pdb_db2';

Output:
[oracle@cdb12c ~]$ sqlplus

SQL*Plus: Release 12.2.0.1.0 Production on Tue Jan 19 15:50:26 2021

Copyright (c) 1982, 2016, Oracle.  All rights reserved.

Enter user-name: /as sysdba

Connected to:
Oracle Database 12c Enterprise Edition Release 12.2.0.1.0 - 64bit Production

SQL> create pluggable database PDB_DB2 from NON$CDB@to_db2_link
  2  create_file_dest='/u01/app/oracle/oradata/cdb2/pdb_db2';

Pluggable database created.

SQL>
5. Execute the noncdb_to_pdb.sql script
export ORACLE_SID=cdb2
sqlplus "/as sysdba"
alter session set container=PDB_DB2;
@$ORACLE_HOME/rdbms/admin/noncdb_to_pdb.sql

OP:
[oracle@cdb12c ~]$ sqlplus

SQL*Plus: Release 12.2.0.1.0 Production on Tue Jan 19 15:54:02 2021

Copyright (c) 1982, 2016, Oracle.  All rights reserved.

Enter user-name: /as sysdba

Connected to:
Oracle Database 12c Enterprise Edition Release 12.2.0.1.0 - 64bit Production

SQL> alter session set container=PDB_DB2;

Session altered.

SQL>
SQL> @$ORACLE_HOME/rdbms/admin/noncdb_to_pdb.sql
SQL> SET SERVEROUTPUT ON
SQL> SET FEEDBACK 1
SQL> SET NUMWIDTH 10
SQL> SET LINESIZE 80
.
.
<output truncated>
.
.
SQL> set verify OFF
SQL> set wrap ON
SQL> set xmloptimizationcheck OFF
SQL>
4. Check the newly created pdb status

Status of the PDBs can be checked using v$pdbs view,

select name, open_mode from v$pdbs;
show pdbs;

SQL> select name, open_mode from v$pdbs;

NAME            OPEN_MODE
--------------- ----------
PDB$SEED        READ ONLY
PDB1            READ WRITE
PDB2            READ WRITE
PDB3            READ WRITE
PDB_DB2         MOUNTED ---> Newly created pdb

6 rows selected.


SQL> show pdbs;

    CON_ID CON_NAME                       OPEN MODE  RESTRICTED
---------- ------------------------------ ---------- ----------
         2 PDB$SEED                       READ ONLY  NO
         3 PDB1                           READ WRITE NO
         4 PDB2                           READ WRITE NO
         5 PDB3                           READ WRITE NO
         6 PDB_DB2                        MOUNTED   -->
SQL>
5. Open the PDB database in read-write mode
--Open newly created pdb:
alter pluggable database pdb_db2 open;
--connect to new pdb
alter session set container=pdb_db2;
select * from faheem.test;

Output:
SQL> alter pluggable database pdb_db2 open;

Pluggable database altered.

SQL> alter session set container=pdb_db2;

Session altered.

SQL> select * from faheem.test;

        ID
----------
         1

1 row selected.

SQL>

We have successfully clone a non-CDB database into a CDB.

Hope this helps…

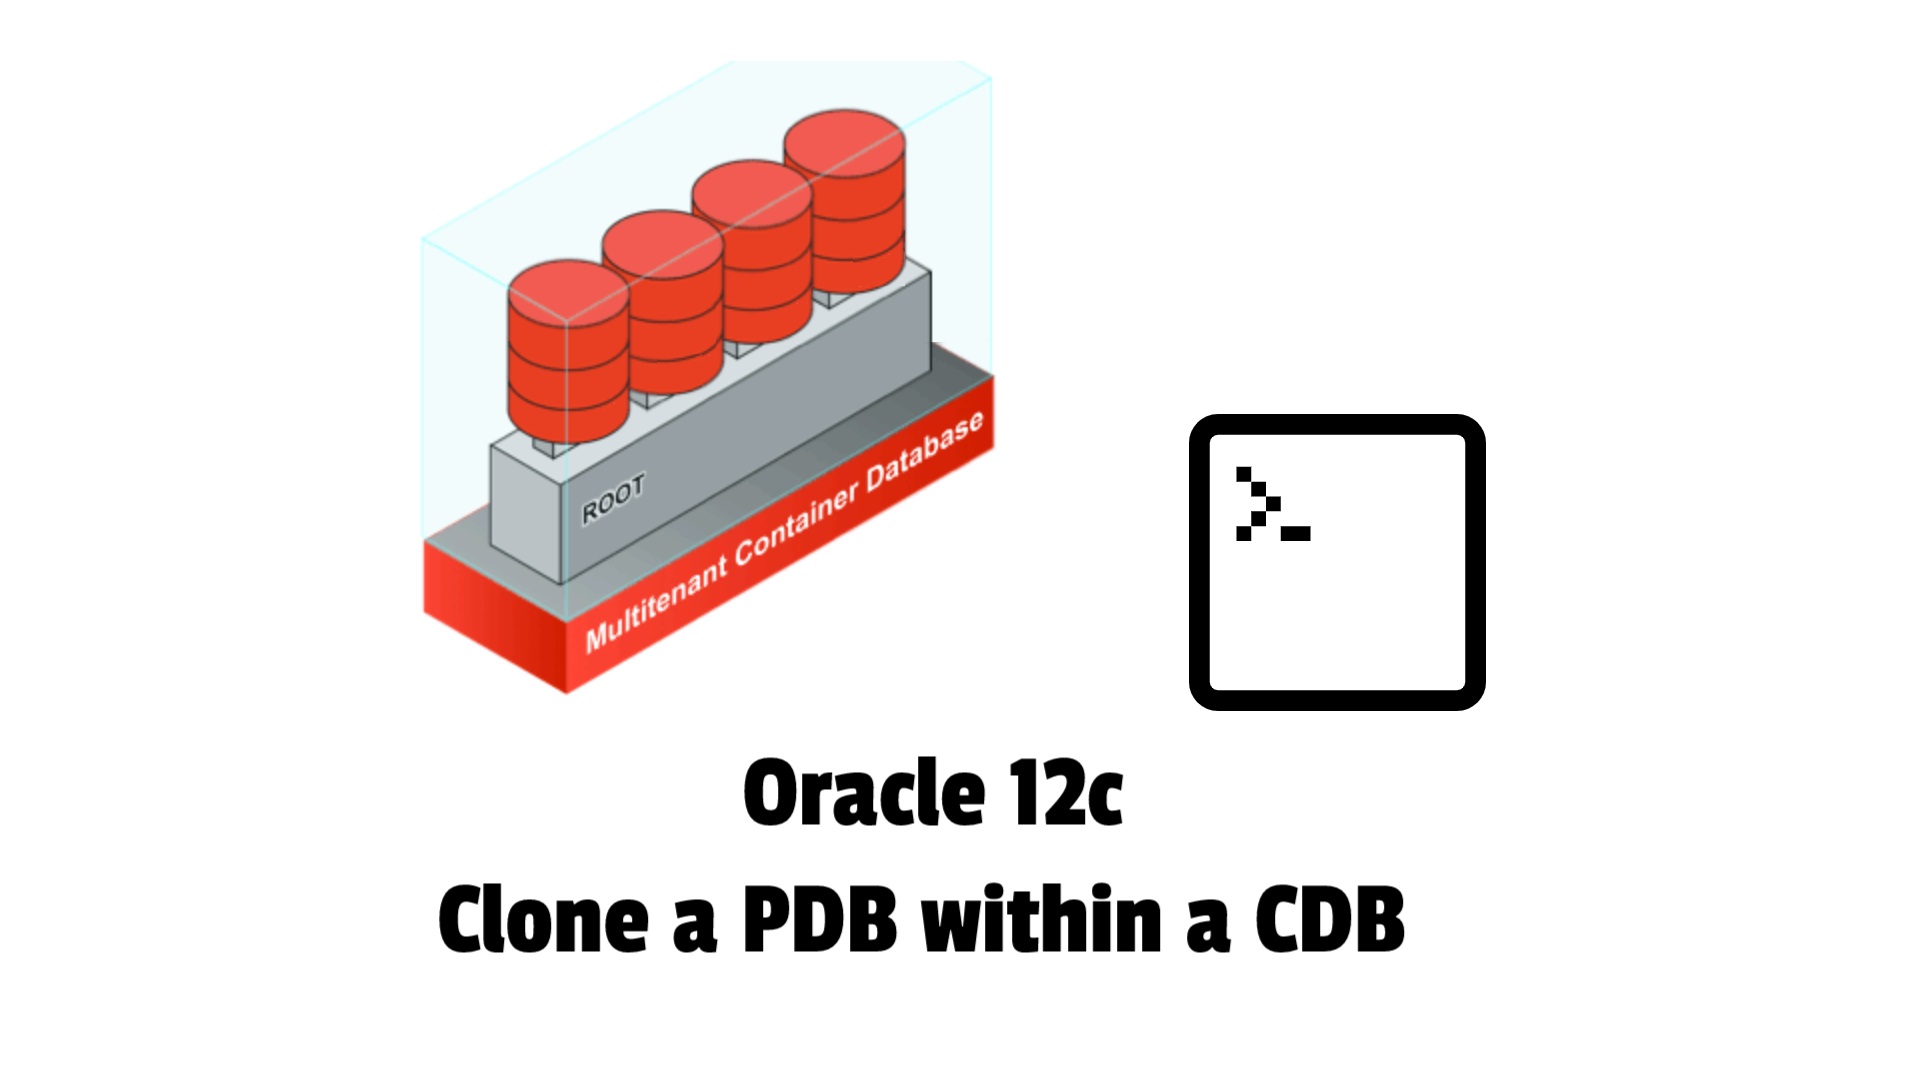
Clone a pluggable database (PDB) within a CDB in Oracle 12c

clone a pdb within a cdb

Oracle has introduced new Multitenant Option from Oracle 12cR1 and this option allows a single container database (CDB) to host multiple pluggable databases.

Refer here for more details on Oracle Multitenant option.

Related articles:

Create Container Database (CDB) in Oracle 12c using DBCA
Create Container database (CDB) in silent mode
Drop a container database in silent mode
Create a pluggable database manually in Oracle 12c

In this post I will describe how to clone a pluggable database (PDB) within the same CDB.

Here Cloning a new PDB pdb3 from pdb2 within CDB cdb2, we will cover the following steps:

  1. Create a directory to store new PDB datafiles
  2. Set PDB2 (source pdb) in Open Read only mode
  3. Clone PDB from PDB2 to PDB3
  4. Check the newly created PDB status
  5. Open the PDB database
1. Create a directory to store new PDB Datafiles
mkdir /u01/app/oracle/oradata/cdb2/pdb3
2. Set pdb2(source PDB) in Open Read only mode
sqlplus "/as sysdba"
alter pluggable database pdb2 close;
alter pluggable database pdb2 open read only;

o/p:

[oracle@cdb12c /]$ . oraenv
ORACLE_SID = [cdb2] ?
The Oracle base remains unchanged with value /u01/app/oracle
[oracle@cdb12c /]$ sqlplus "/as sysdba"

SQL*Plus: Release 12.2.0.1.0 Production on Mon Jan 18 15:51:40 2021
Copyright (c) 1982, 2016, Oracle.  All rights reserved.
Connected to:
Oracle Database 12c Enterprise Edition Release 12.2.0.1.0 - 64bit Production

SQL> alter pluggable database pdb2 close;
Pluggable database altered.
SQL> alter pluggable database pdb2 open read only;
Pluggable database altered.
SQL>
3. Clone PDB from PDB2 to PDB3
create pluggable database pdb3 from pdb2
create_file_dest='/u01/app/oracle/oradata/cdb2/pdb3';

Output:

SQL> create pluggable database pdb3 from pdb2
  2  create_file_dest='/u01/app/oracle/oradata/cdb2/pdb3';

Pluggable database created.

SQL>
4. Check the newly created pdb status

Status of the PDBs can be checked using v$pdbs view,

select name, open_mode from v$pdbs;
show pdbs;

SQL> select name, open_mode from v$pdbs;

NAME            OPEN_MODE
--------------- ----------
PDB$SEED        READ ONLY
PDB1            READ WRITE
PDB2            READ ONLY
PDB3            MOUNTED  -->newly created pdb

SQL> show pdbs;

    CON_ID CON_NAME                       OPEN MODE  RESTRICTED
---------- ------------------------------ ---------- ----------
         2 PDB$SEED                       READ ONLY  NO
         3 PDB1                           READ WRITE NO
         4 PDB2                           READ ONLY  NO
         5 PDB3                           MOUNTED
SQL>

5. Open the PDB database in read-write mode
--Open source pdb if required:
alter pluggable database pdb2 close;
alter pluggable database pdb2 open;

--Open newly created pdb:
alter pluggable database pdb3 open;

Output:
SQL> alter pluggable database pdb2 close;
Pluggable database altered.
SQL> alter pluggable database pdb2 open;
Pluggable database altered.

SQL> alter pluggable database pdb3 open;
Pluggable database altered.
SQL>

We have successfully cloned PDB3 from PDB2 database and opened it in read-write mode.

Hope this helps…

Create a pluggable database manually in Oracle 12c

create pdb manually

Oracle has introduced new Multitenant Option from Oracle 12cR1 and this option allows a single container database (CDB) to host multiple pluggable databases.

Related articles:

Create Container Database (CDB) in Oracle 12c using DBCA
Create Container database (CDB) in silent mode
Drop a container database in silent mode

In this post I will describe how to create a pluggable database (PDB) from seed. We will cover the following steps:

  1. Create a directory to store new PDB datafiles
  2. Create PDB database using SQL*PLUS
  3. Check the newly created PDB status
  4. Open the PDB database
1. Create a directory to store new PDB Datafiles
mkdir /u01/app/oracle/oradata/cdb2/pdb2
2. Create PDB database using SQL*PLUS
CREATE PLUGGABLE DATABASE pdb2 
ADMIN USER admin_user IDENTIFIED BY Oracle_#123
CREATE_FILE_DEST='/u01/app/oracle/oradata/cdb2/pdb2';

Output:

SQL> CREATE PLUGGABLE DATABASE pdb2
  2  ADMIN USER admin_user IDENTIFIED BY Oracle_#123
  3  CREATE_FILE_DEST='/u01/app/oracle/oradata/cdb2/pdb2';

Pluggable database created.

SQL>
3. Check the newly created pdb status

Status of the PDBs can be checked using v$pdbs view,

select name, open_mode from v$pdbs;
show pdbs;

SQL> select name, open_mode from v$pdbs;

NAME            OPEN_MODE
--------------- ----------
PDB$SEED        READ ONLY
PDB1            READ WRITE
PDB2            MOUNTED

SQL> show pdbs;

    CON_ID CON_NAME                       OPEN MODE  RESTRICTED
---------- ------------------------------ ---------- ----------
         2 PDB$SEED                       READ ONLY  NO
         3 PDB1                           READ WRITE NO
         4 PDB2                           MOUNTED
SQL>
4. Open the PDB database in read-write mode
alter pluggable database pdb2 open;
select name, open_mode from v$pdbs;

Output:

SQL> alter pluggable database pdb2 open;

Pluggable database altered.

SQL> select name, open_mode from v$pdbs;

NAME            OPEN_MODE
--------------- ----------
PDB$SEED        READ ONLY
PDB1            READ WRITE
PDB2            READ WRITE

We have created a new PDB pdb2 from seed database and opened it in read-write mode.

Hope this helps…